这篇文章主要是讲述如何使用 TypeScript 编写一个完善,包含测试、文档、持续集成的库,涵盖了编写整个库所需要的技术和工具,主要涵盖:
- 项目目录骨架
- TypeScript 配置
- 使用 jest 单元测试
- 使用 vuepress 编写文档
- 使用 github pages 部署文档
- 持续集成部署
前端开发 QQ 群:377786580
欢迎使用和了解滴滴金融出品的移动端组件库 Mand-mobile。
为了迎合这篇文章,我编写了一个可以开箱即用的库模板:https://github.com/linkFly6/ts-lib-basic。
里面集成了这篇文章所阐述的所有内容。
初始化项目目录
先初始化项目目录,一般来说,src 放源码,dist 放编译后的代码,tests 放单元测试,所以先初始化好基础目录。
1
2
3
4
5
6
7
8
9
10
11
12
13
14
15
| .
├── .vscode
│ └── launch.json
├── dist
├── src
├── tests
├── .gitignore
├── .npmrc
├── .travis.yml
├── LICENSE
├── README.md
├── package-lock.json
├── package.json
├── tsconfig.json
└── tslint.json
|
先按照这个目录文件结构,然后我们会一步步填上内容。
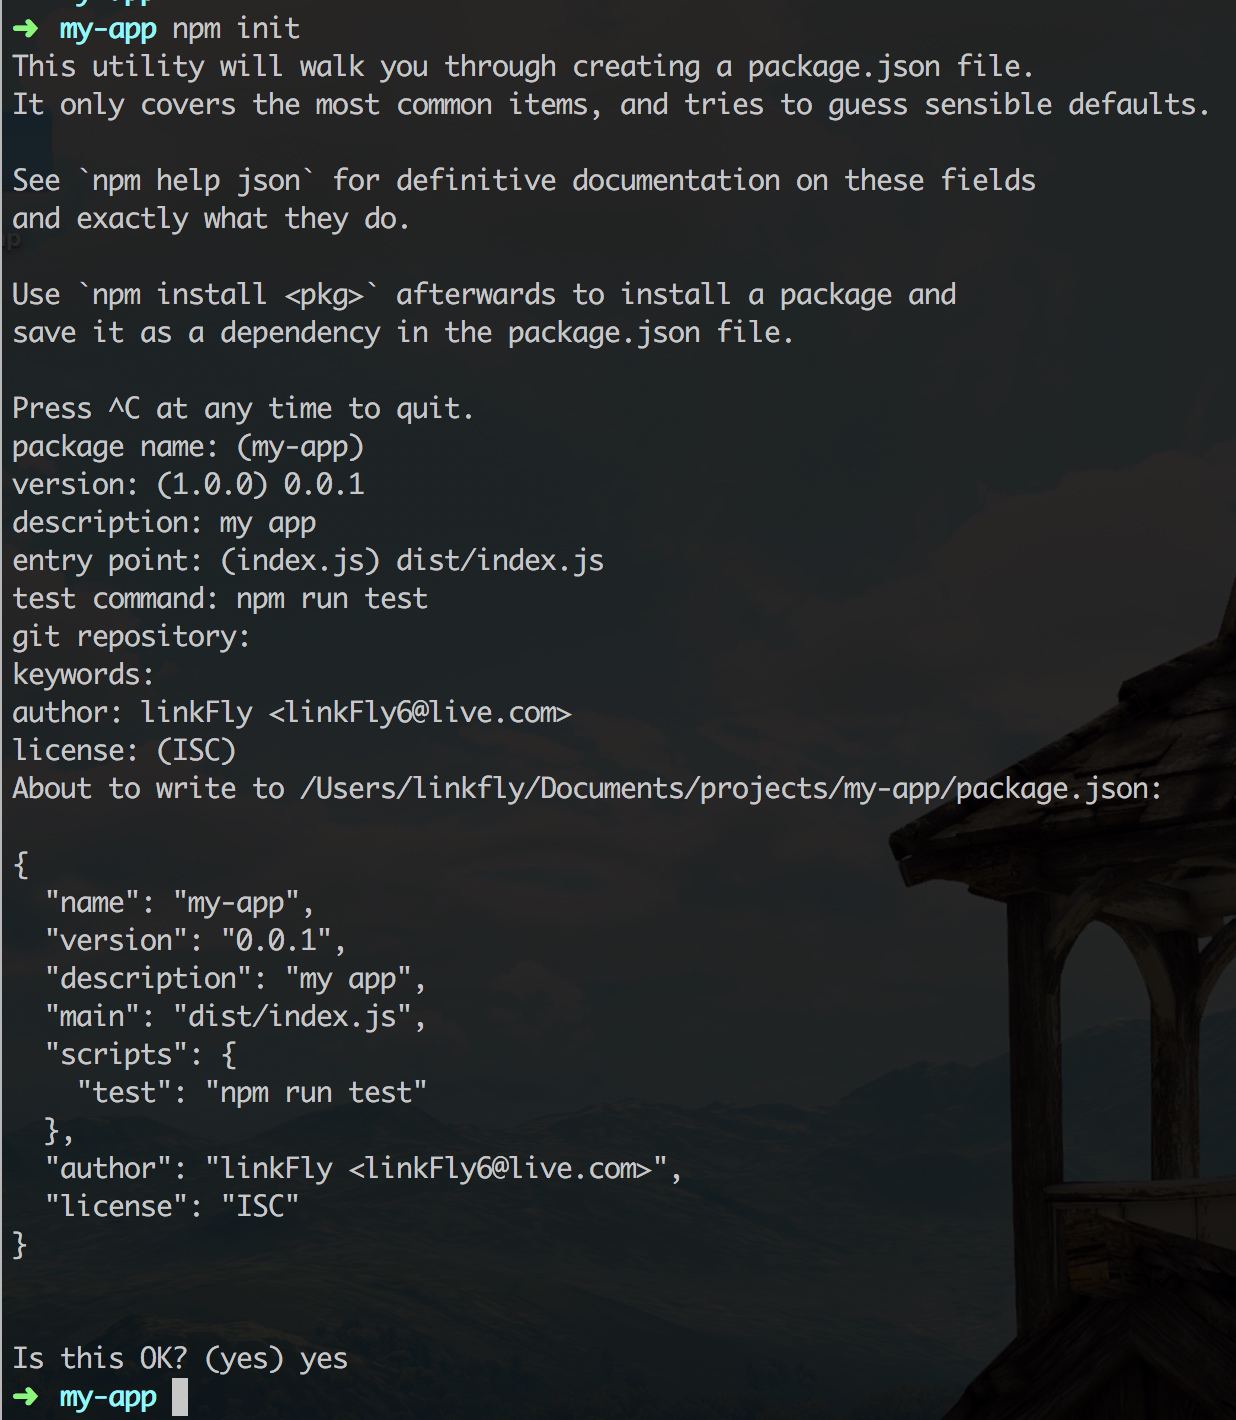
通过 npm init 初始化一个 npm 配置:
初始化 TypeScript 相关工具
既然包是基于 TypeScript 的,那么 TypeScript 工具必不可少。
ts-node
在开发中,可以使用 ts-node(可以理解为可以直接执行 ts 文件的 node)来直接运行我们的 ts 代码。
1
2
| npm i --save-dev typescript
npm i --save-dev ts-node
|
如果是 node 应用,为了让 TypeScript 能够进行 node 类型推导,则需要安装 Node 对应的类型声明:
1
| npm i --save-dev @types/node
|
tsconfig.json
tsconfig.json 是 TypeScript 的配置文件,这里提供一份可供参考是配置,置于项目根目录:
1
2
3
4
5
6
7
8
9
10
11
12
13
14
15
16
17
18
19
20
21
22
23
24
25
| {
"compilerOptions": {
"sourceMap": false,
"module": "commonjs",
"noImplicitAny": true,
"types": [
"node",
],
"baseUrl": ".",
"paths": {
"~/*": [
"./types/*"
]
},
"target": "es6",
"outDir": "dist",
"declaration": true,
},
"include": [
"src/**/*"
],
}
|
tslint.json
tslint 类似 eslint,是 TypeScript 中的代码风格约束工具。
关于 lint,个人方面比较倾向于非强制性的,所以只在 vscode 中安装了扩展 tslint,这样 vscode 会根据项目根目录配置的 tslint.json 标出不符合规范的信息。
这里有一份推荐配置:
1
2
3
4
5
6
7
8
9
10
11
12
13
14
15
16
17
18
19
20
21
22
23
24
25
26
27
28
29
30
31
32
33
34
35
36
37
38
39
40
41
42
43
44
45
46
47
48
49
50
51
52
53
54
55
56
57
58
59
60
61
62
63
64
65
66
67
68
69
70
71
72
73
74
75
76
77
78
79
80
81
82
83
84
85
86
87
88
89
90
91
92
93
94
95
96
97
98
99
100
101
102
103
104
| {
"defaultSeverity": "error",
"extends": [
"tslint:recommended"
],
"jsRules": {},
"rules": {
"max-line-length": [
true,
140
],
"ban-types": false,
"no-parameter-reassignment": false,
"no-empty-interface": true,
"no-inferrable-types": true,
"no-internal-module": true,
"no-namespace": true,
"no-reference": true,
"no-var-requires": false,
"ordered-imports": false,
"object-literal-sort-keys": false,
"semicolon": [
false,
"always"
],
"quotemark": [
true,
"single",
"jsx-double"
],
"no-arg": true,
"curly": false,
"only-arrow-functions": false,
"no-consecutive-blank-lines": false,
"space-before-function-paren": false,
"arrow-parens": [
true,
"ban-single-arg-parens"
],
"no-shadowed-variable": false,
"no-trailing-whitespace": false,
"triple-equals": false,
"no-bitwise": false,
"no-console": false,
"variable-name": [
true,
"ban-keywords"
],
"one-variable-per-declaration": false,
"max-classes-per-file": [
true,
5
],
"no-unused-expression": [
true,
"allow-fast-null-checks"
],
"no-empty": false,
"forin": false,
"no-debugger": false,
"typedef": [
true
]
},
"rulesDirectory": [
"./src"
]
}
|
package-lock.json
package-lock.json 是 npm 5 之后引入的,为了解决 npm 过去使用的 package.json 版本依赖太宽松的问题。
比如说 package.json 中依赖了包 mand-mobile,使用了最常用的插入依赖(^):
1
| "mand-mobile": "^4.16.4",
|
假设自己项目在上线阶段, mand-mobile 更新到了 mand-mobile@4.17.0,而刚好 mand-mobile@4.17.0 又不小心出现了一个新 bug 会导致页面脚本错误。这时候上线安装依赖的时候,由于 package.json 和 ^ 约束太宽松,就会导致 mand-mobile@4.17.0 被安装,从而导致上线出问题。
package-lock.json 就是为了解决这个问题,通过 npm 安装包的时候,会检测本地是否有 package-lock.json。
- 如果没有
package-lock.json,就在安装包的时候将当前包依赖的详细信息(包括子级依赖)都写入生成 package-lock.json。
- 如果有
package-lock.json,则根据 package.json,参考 pacakge-lock.json 来安装包依赖。来保证依赖稳定。
本质上 ppackage-lock.json 的作用类似于 node_modules 包依赖的快照。
单元测试
一个合格的库应该包含完整的单元测试。这里我们使用 jest 对应的 TypeScript 版本:ts-jest。
ts-jest
ts-jest 是 jest 的 TypeScript 支持版,API 和 jest 是一样的,它能够直接运行 .ts 为后缀的单元测试文件。
安装 ts-jest 和对应的类型声明文件:
1
2
3
| npm i --save-dev jest
npm i --save-dev ts-jest
npm i --save-dev @types/jest
|
在 package.json 中加入 jest 配置和 npm run test 的脚本:
1
2
3
4
5
6
7
8
9
10
11
12
13
14
15
16
17
18
19
20
21
22
| {
"name": "my-app",
"main": "dist/index.js",
"scripts": {
"test": "jest --verbose"
},
"jest": {
"rootDir": "tests",
"transform": {
"^.+\\.tsx?$": "ts-jest"
},
"testRegex": "(/__tests__/.*|(\\.|/)(test|spec))\\.tsx?$",
"moduleFileExtensions": [
"ts",
"tsx",
"js",
"jsx",
"json",
"node"
]
}
}
|
这时候就可以基于 jest 编写单元测试了。在 tests/ 目录下加入 example.test.ts:
1
2
3
4
5
6
7
8
9
10
11
12
13
14
15
| import { isArrayLike } from '../src'
describe('my-app:isArrayLike', () => {
test('isArrayLike(): true', () => {
expect(
isArrayLike([]),
).toBe(true)
})
test('isArrayLike(): false', () => {
expect(
isArrayLike({}),
).toBe(false)
})
})
|
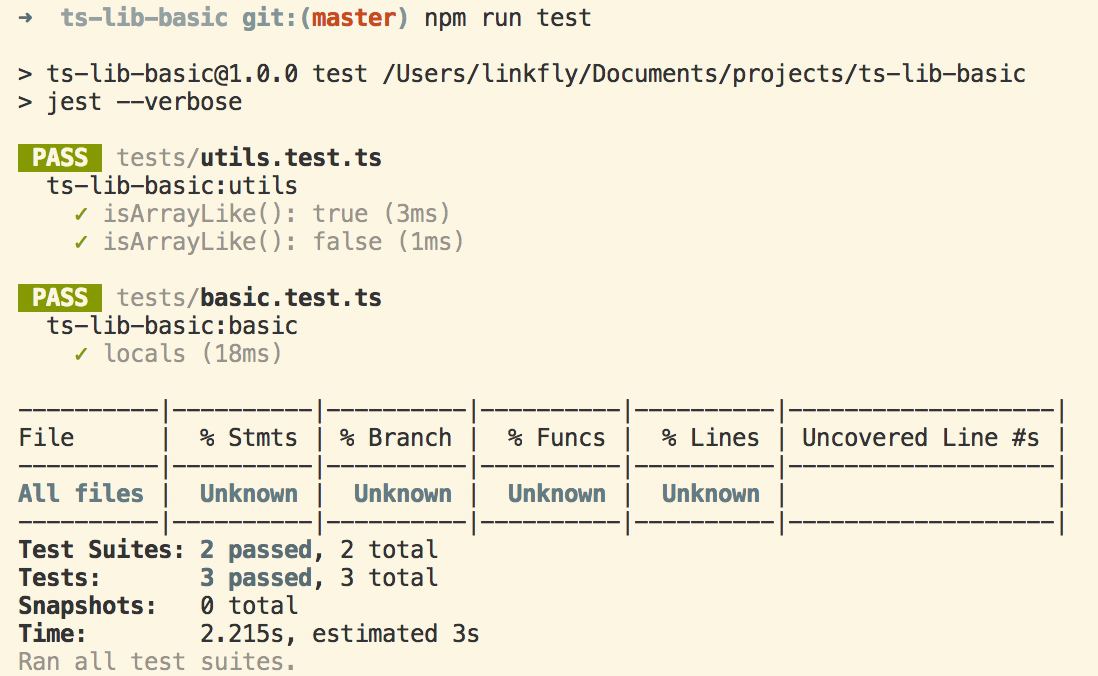
然后执行 npm run test 即可看到单元测试结果。
express 测试
如果要测试 express/koa 之类的 web 应用框架程序,则可以使用 tj 大神的 supertest。
安装对应的包:
1
2
| npm i --save-dev supertest
npm i --save-dev @types/supertest
|
1
2
3
4
5
6
7
8
9
10
11
12
13
14
15
16
17
18
| import * as express from 'express'
import * as request from 'supertest'
import middleware from '../src'
describe('my-app:basic', () => {
test('locals', done => {
const app = express()
app.use(middleware)
app.get('/example', (req, res) => {
res.send({ code: 0 })
})
request(app).get('/example').expect(200, { code: 0 }, done)
})
})
|
debug
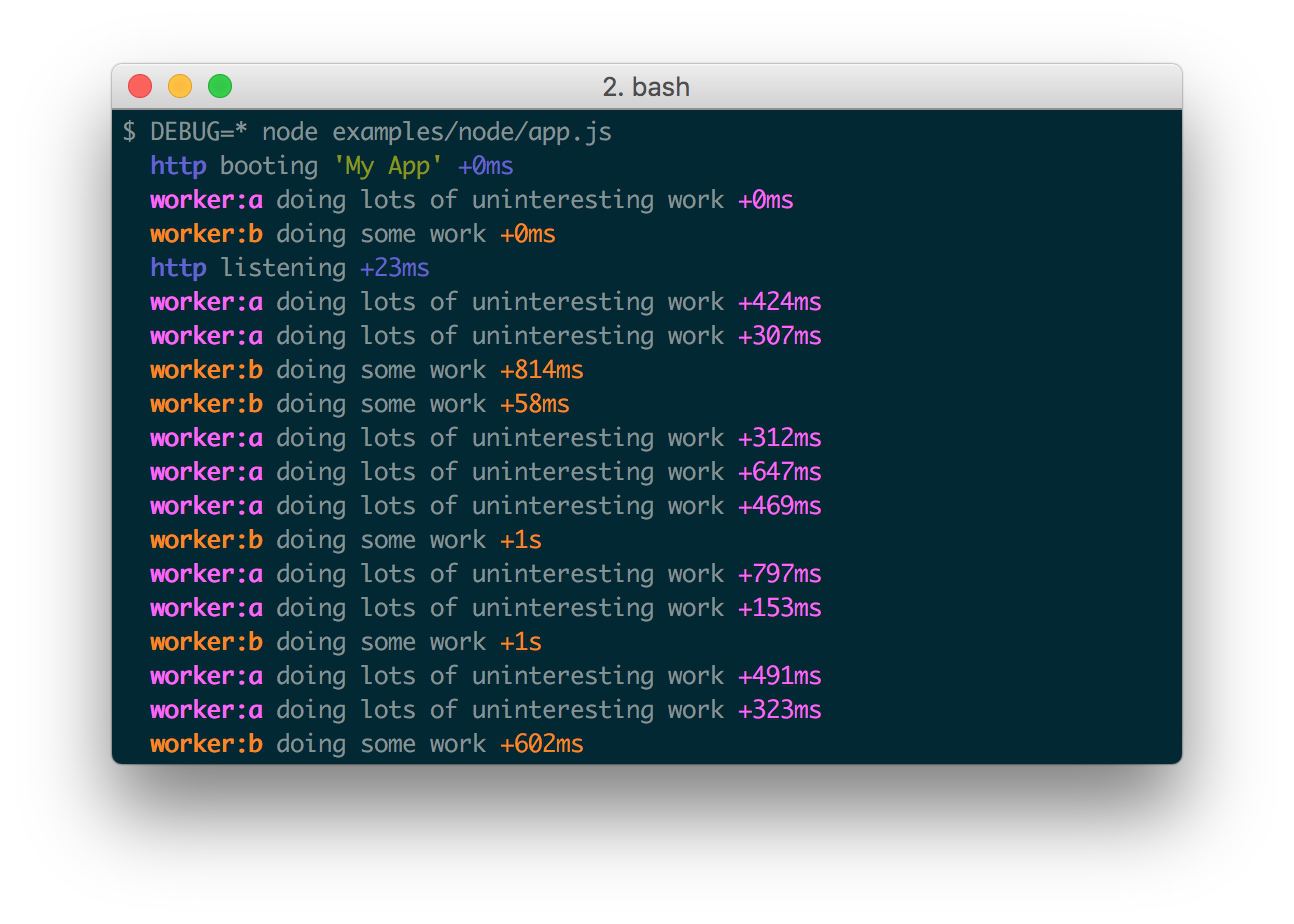
debug 也是 tj 大神编写的一个库,用于在应用程序中输出 debug 信息,用于调试工具库,著名的库大部分都采用该库进行 debug 支持。
1
2
| npm i --save debug
npm i --save-dev @types/debug
|
1
2
3
4
5
| import * as d from 'debug'
const debug = d(`my-app:basic`)
debug('debug info')
|
在启动应用程序的时候,只需要在环境变量中注入 DEBUG 即可:
1
2
3
| DEBUG=my-app* node app.js
DEBUG=my-app* ts-node app.ts
|
vscode 基于 ts-node 调试
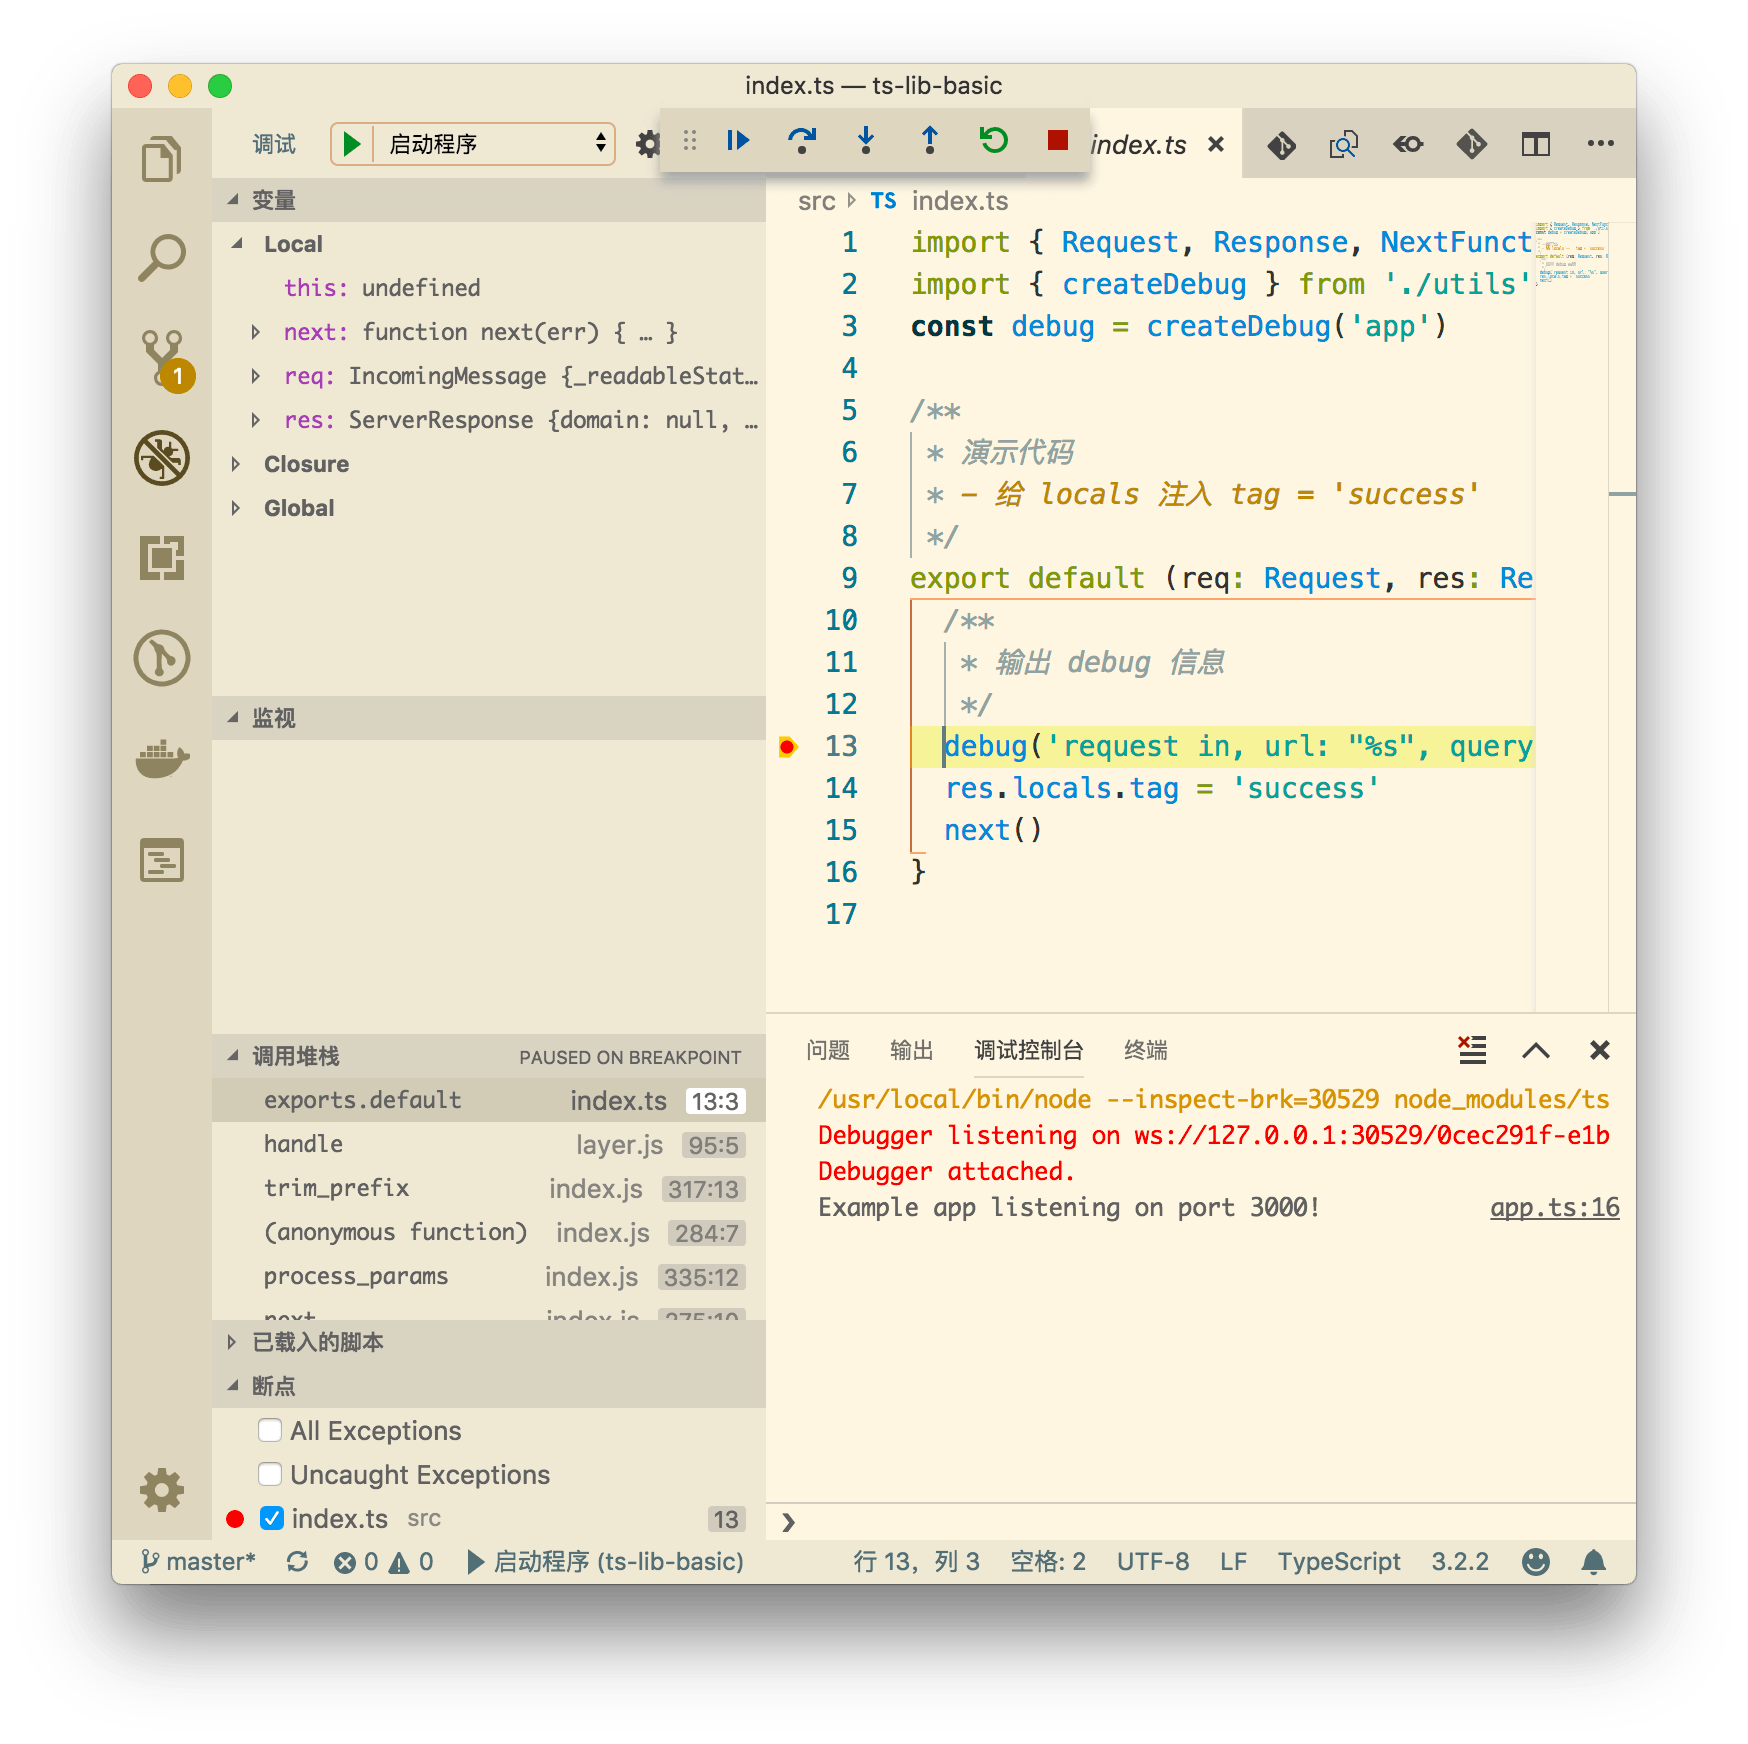
在 .vscode/launch.json 中可以配置基于 ts-node 的调试:
1
2
3
4
5
6
7
8
9
10
11
12
13
14
15
16
17
18
19
20
| {
"version": "0.2.0",
"configurations": [
{
"type": "node",
"request": "launch",
"name": "启动程序",
"program": "${workspaceFolder}/node_modules/ts-node/dist/bin.js",
"args": [
"-P",
"${workspaceRoot}/tests/tsconfig.json",
"${workspaceRoot}/tests/app.ts",
]
}
]
}
|
文档
文档方面,简陋一点的,可以直接使用 README,也可以用 gitbook。不过我个人方便比较推荐 vuepress。
远程托管文档方面,要么自建服务器,要么直接托管到 Github 的 Pages。
使用 vuepress 编写文档
个人比较倾向于使用 vuepress 编写文档,是因为里面扩展 Markdown 扩展了许多丰富实用的语法,以及菜单结构的强大可配置。
这里我们讨论的是在项目中集成文档。
- 在项目根目录新建目录
/docs
npm i --save-dev vuepress- 在项目的
package.json 中加入脚本
1
2
3
4
| "scripts": {
"docs": "vuepress dev docs",
"docs:build": "vuepress build docs"
}
|
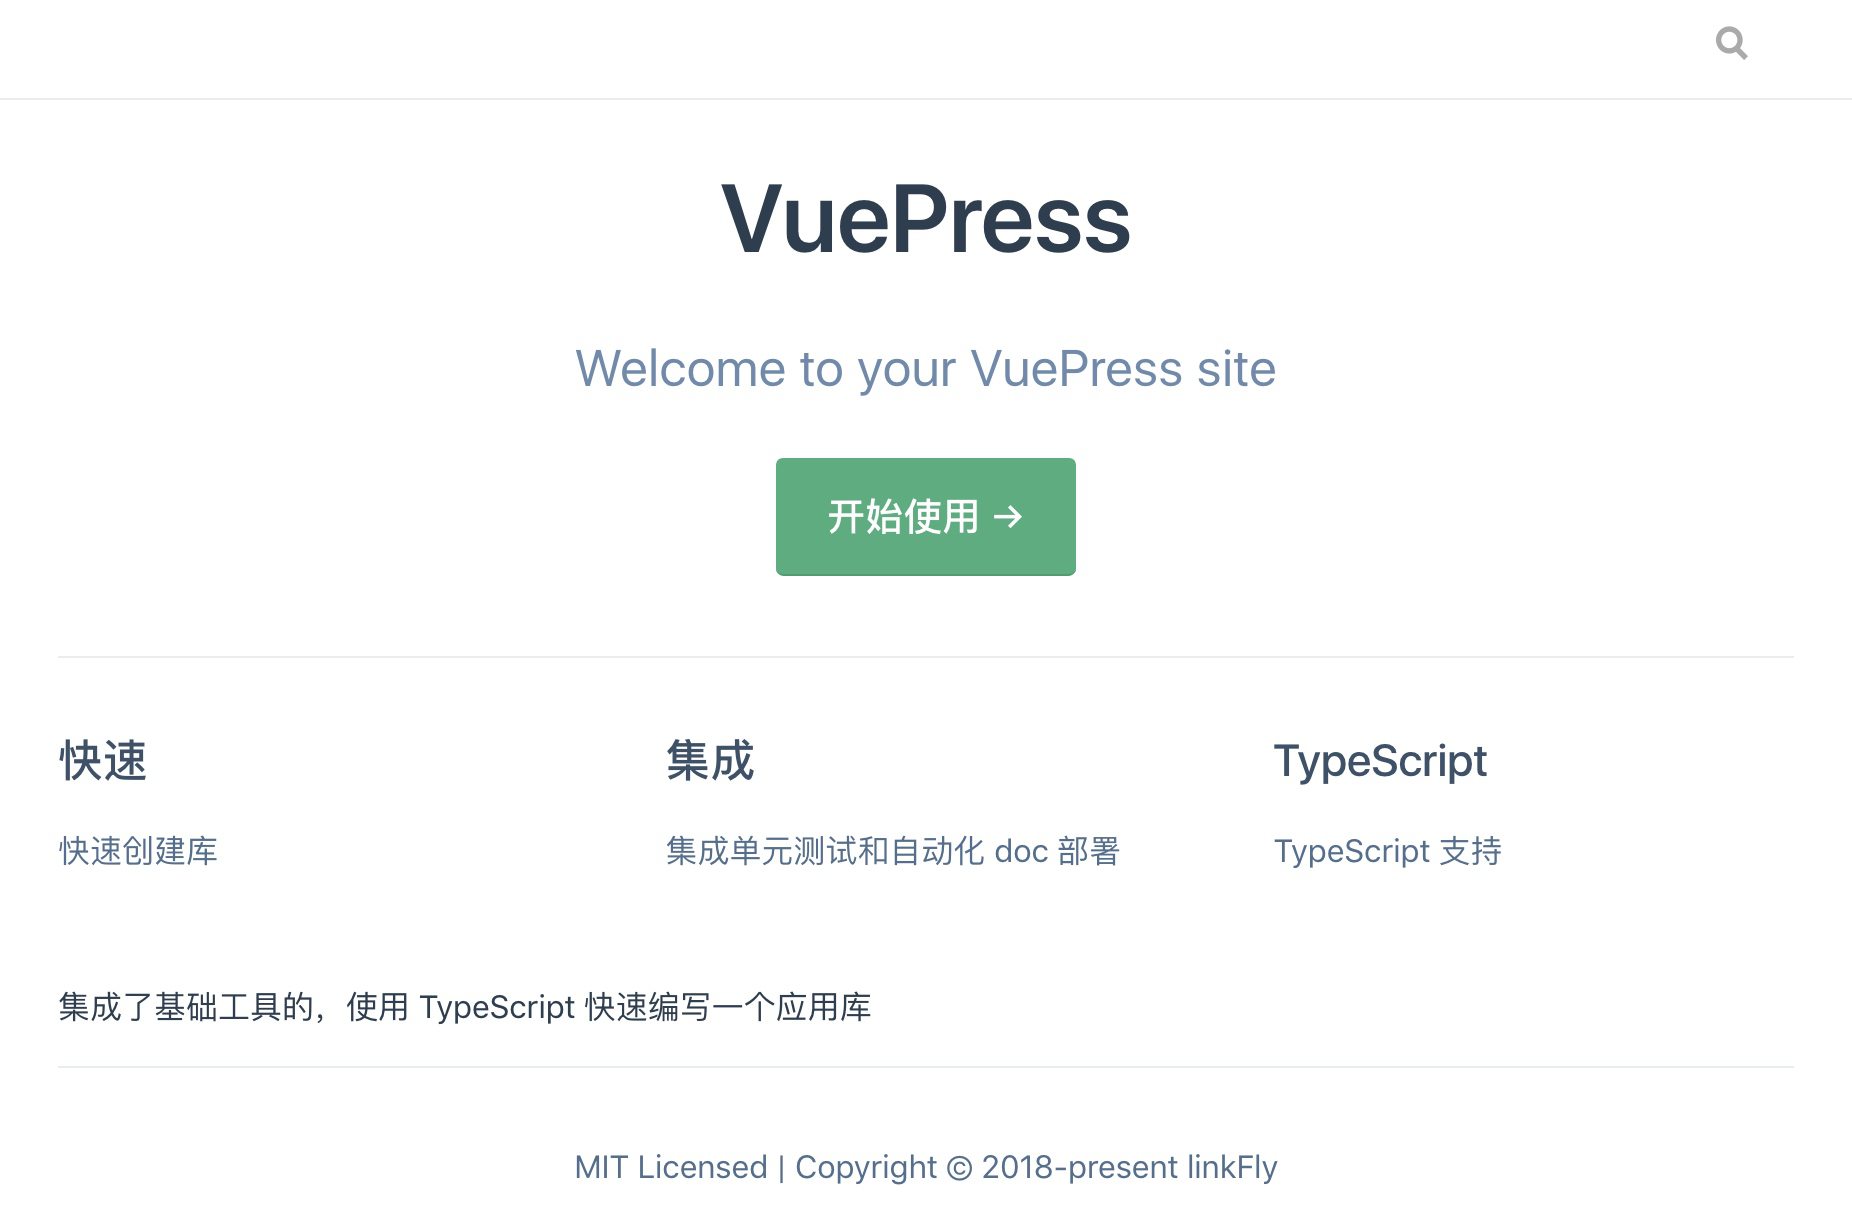
在 /docs 新增文件 README.md,写入以下内容:
1
2
3
4
5
6
7
8
9
10
11
12
13
14
15
| ---
home: true
actionText: 开始使用 →
actionLink: /readme
footer: MIT Licensed | Copyright © 2018-present linkFly
features:
- title: 快速
details: 快速创建库
- title: 集成
details: 集成单元测试和自动化 doc 部署
- title: TypeScript
details: TypeScript 支持
---
集成了基础工具的,使用 TypeScript 快速编写一个应用库
|
然后执行结合我们刚才配置的命令,执行 npm run docs,终端 shell 会输出 vuepress 启动的服务地址:

访问地址,即可看到文档页面:
使用 github pages 托管文档
github pages 是 Github 提供的一个免费的页面托管服务,我们可以将 vuepress 编译出来的文档托管到上面。
Github Pages 服务和 Github 已经打通,可以从项目的 /docs 目录自动部署,这也就是我们为什么要在项目里新建 /docs 目录的原因。
首先,我们将项目中 pageage.json 的脚本进行更新:
1
2
3
| "scripts": {
"docs:build": "vuepress build docs && cp -rf ./docs/.vuepress/dist/* ./docs && rm -r ./docs/.vuepress/dist"
}
|
这段脚本的大体意思就是先使用 vuepress 构建产出文档的 HTML 文件(在 /docs/.vuepress/dist 目录下),然后将 dist 目录移动到 docs/ 目录下,因为 Github Pages 在识别 docs/ 的时候只能识别 docs/index.html。
执行 npm run docs:build。
将本地的项目 push 到 Github 以后,打开该项目的 Setting:

在 Github Pages 配置项选择 docs/ 文件夹:
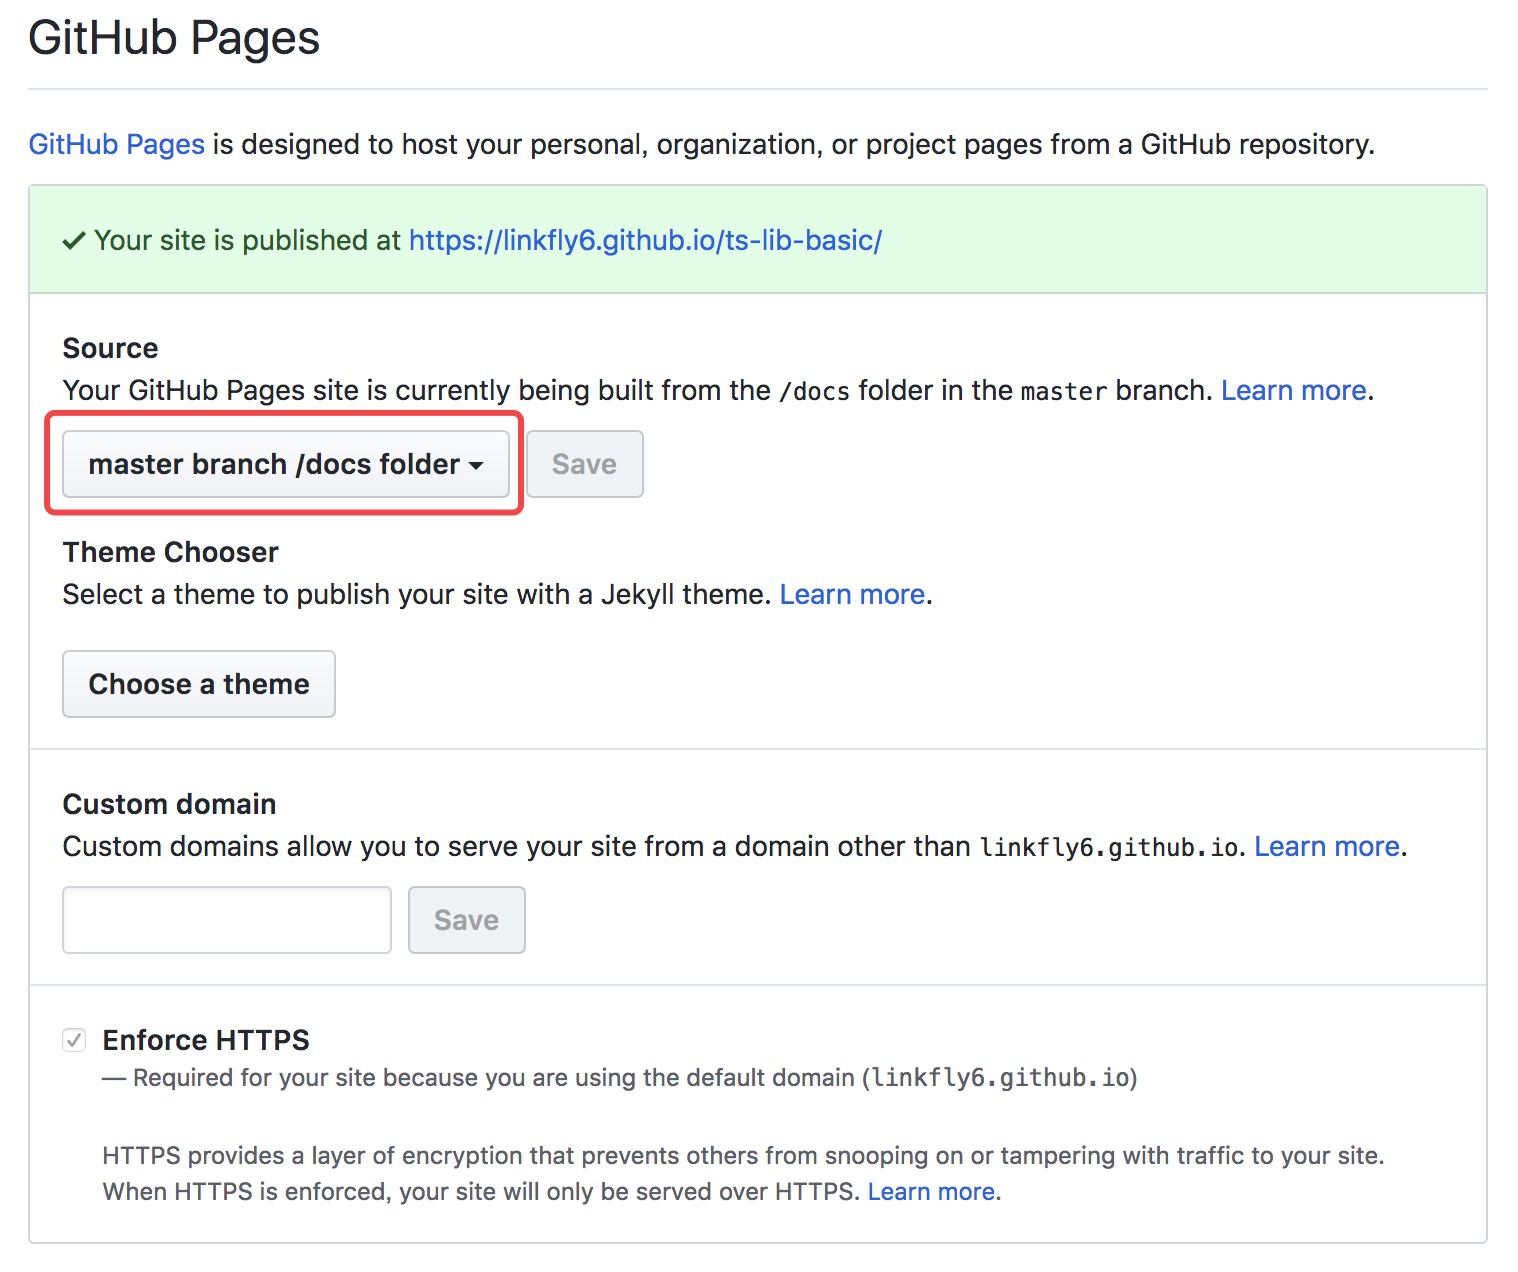
然后访问 https://<USERNAME or GROUP>.gitlab.io/<REPO>/ 即可看到自动部署的文档。例如:https://linkfly6.github.io/ts-lib-basic/。
使用持续集成服务 travis-ci
travis-ci 是一个持续集成服务,它可以用来自动部署和构建 Github 上的项目。
我们可以集成我们的单元测试。
在项目根目录加入 .travis.yml,在 master 分支进行提交的时候自动运行 npm run test 命令(npm run test 命令配置参见 ts-jest 章节):
1
2
3
4
5
6
7
8
9
10
11
12
13
14
15
| sudo: false
language: node_js
node_js:
- "8"
cache:
directories:
- node_modules
branches:
only:
- master
script:
npm run test
|
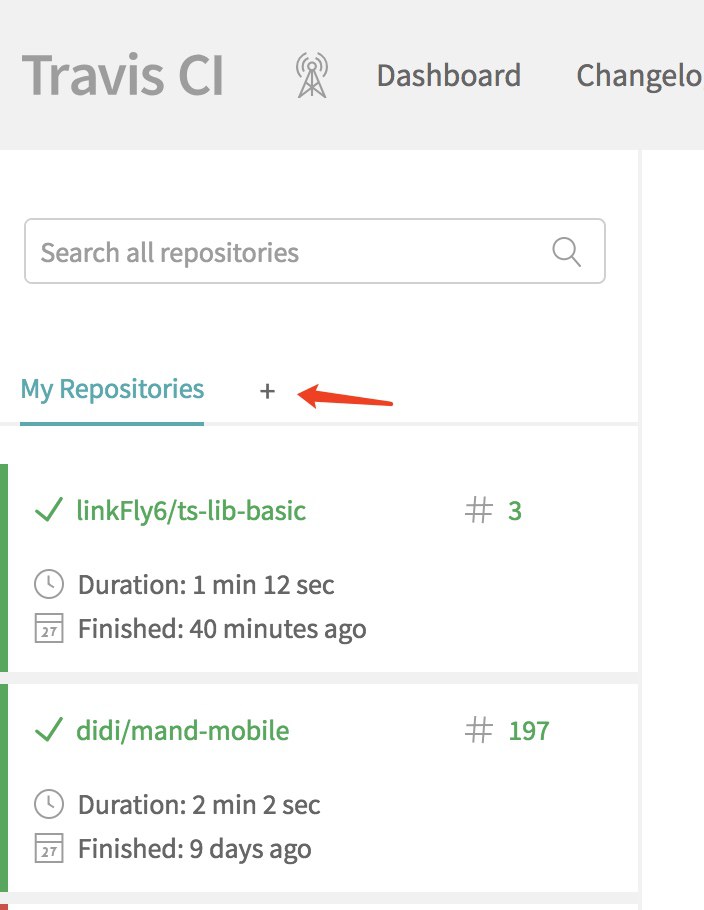
打开 https://travis-ci.org/ 进行注册或登录。新增接入的项目:
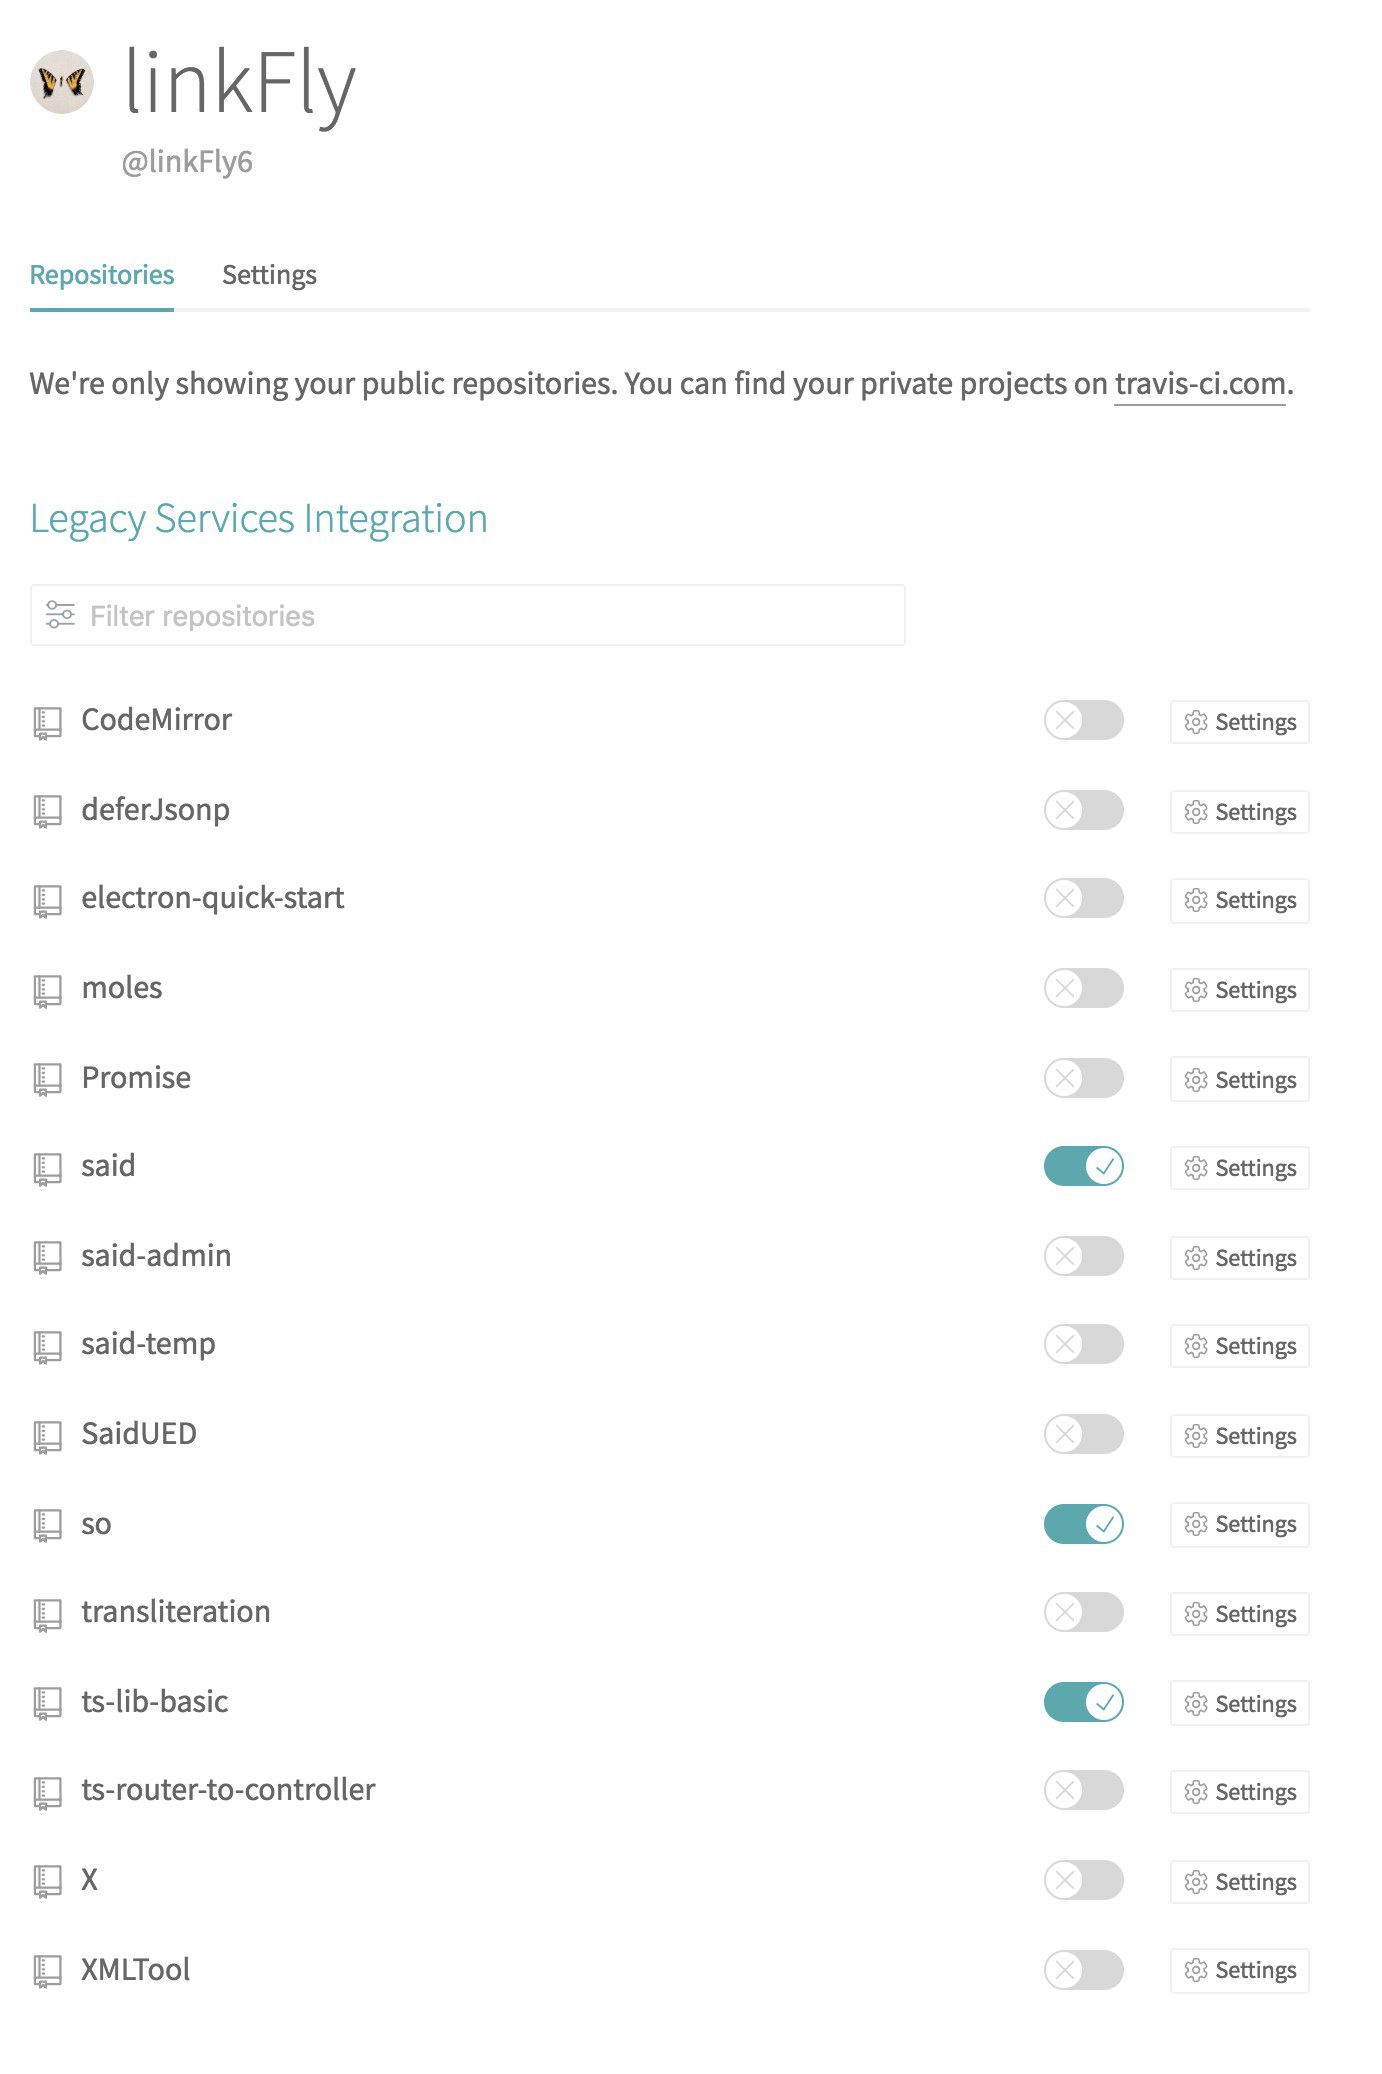
选择要打开持续集成的项目:
然后我们更新文档或代码,提交代码到 Github。
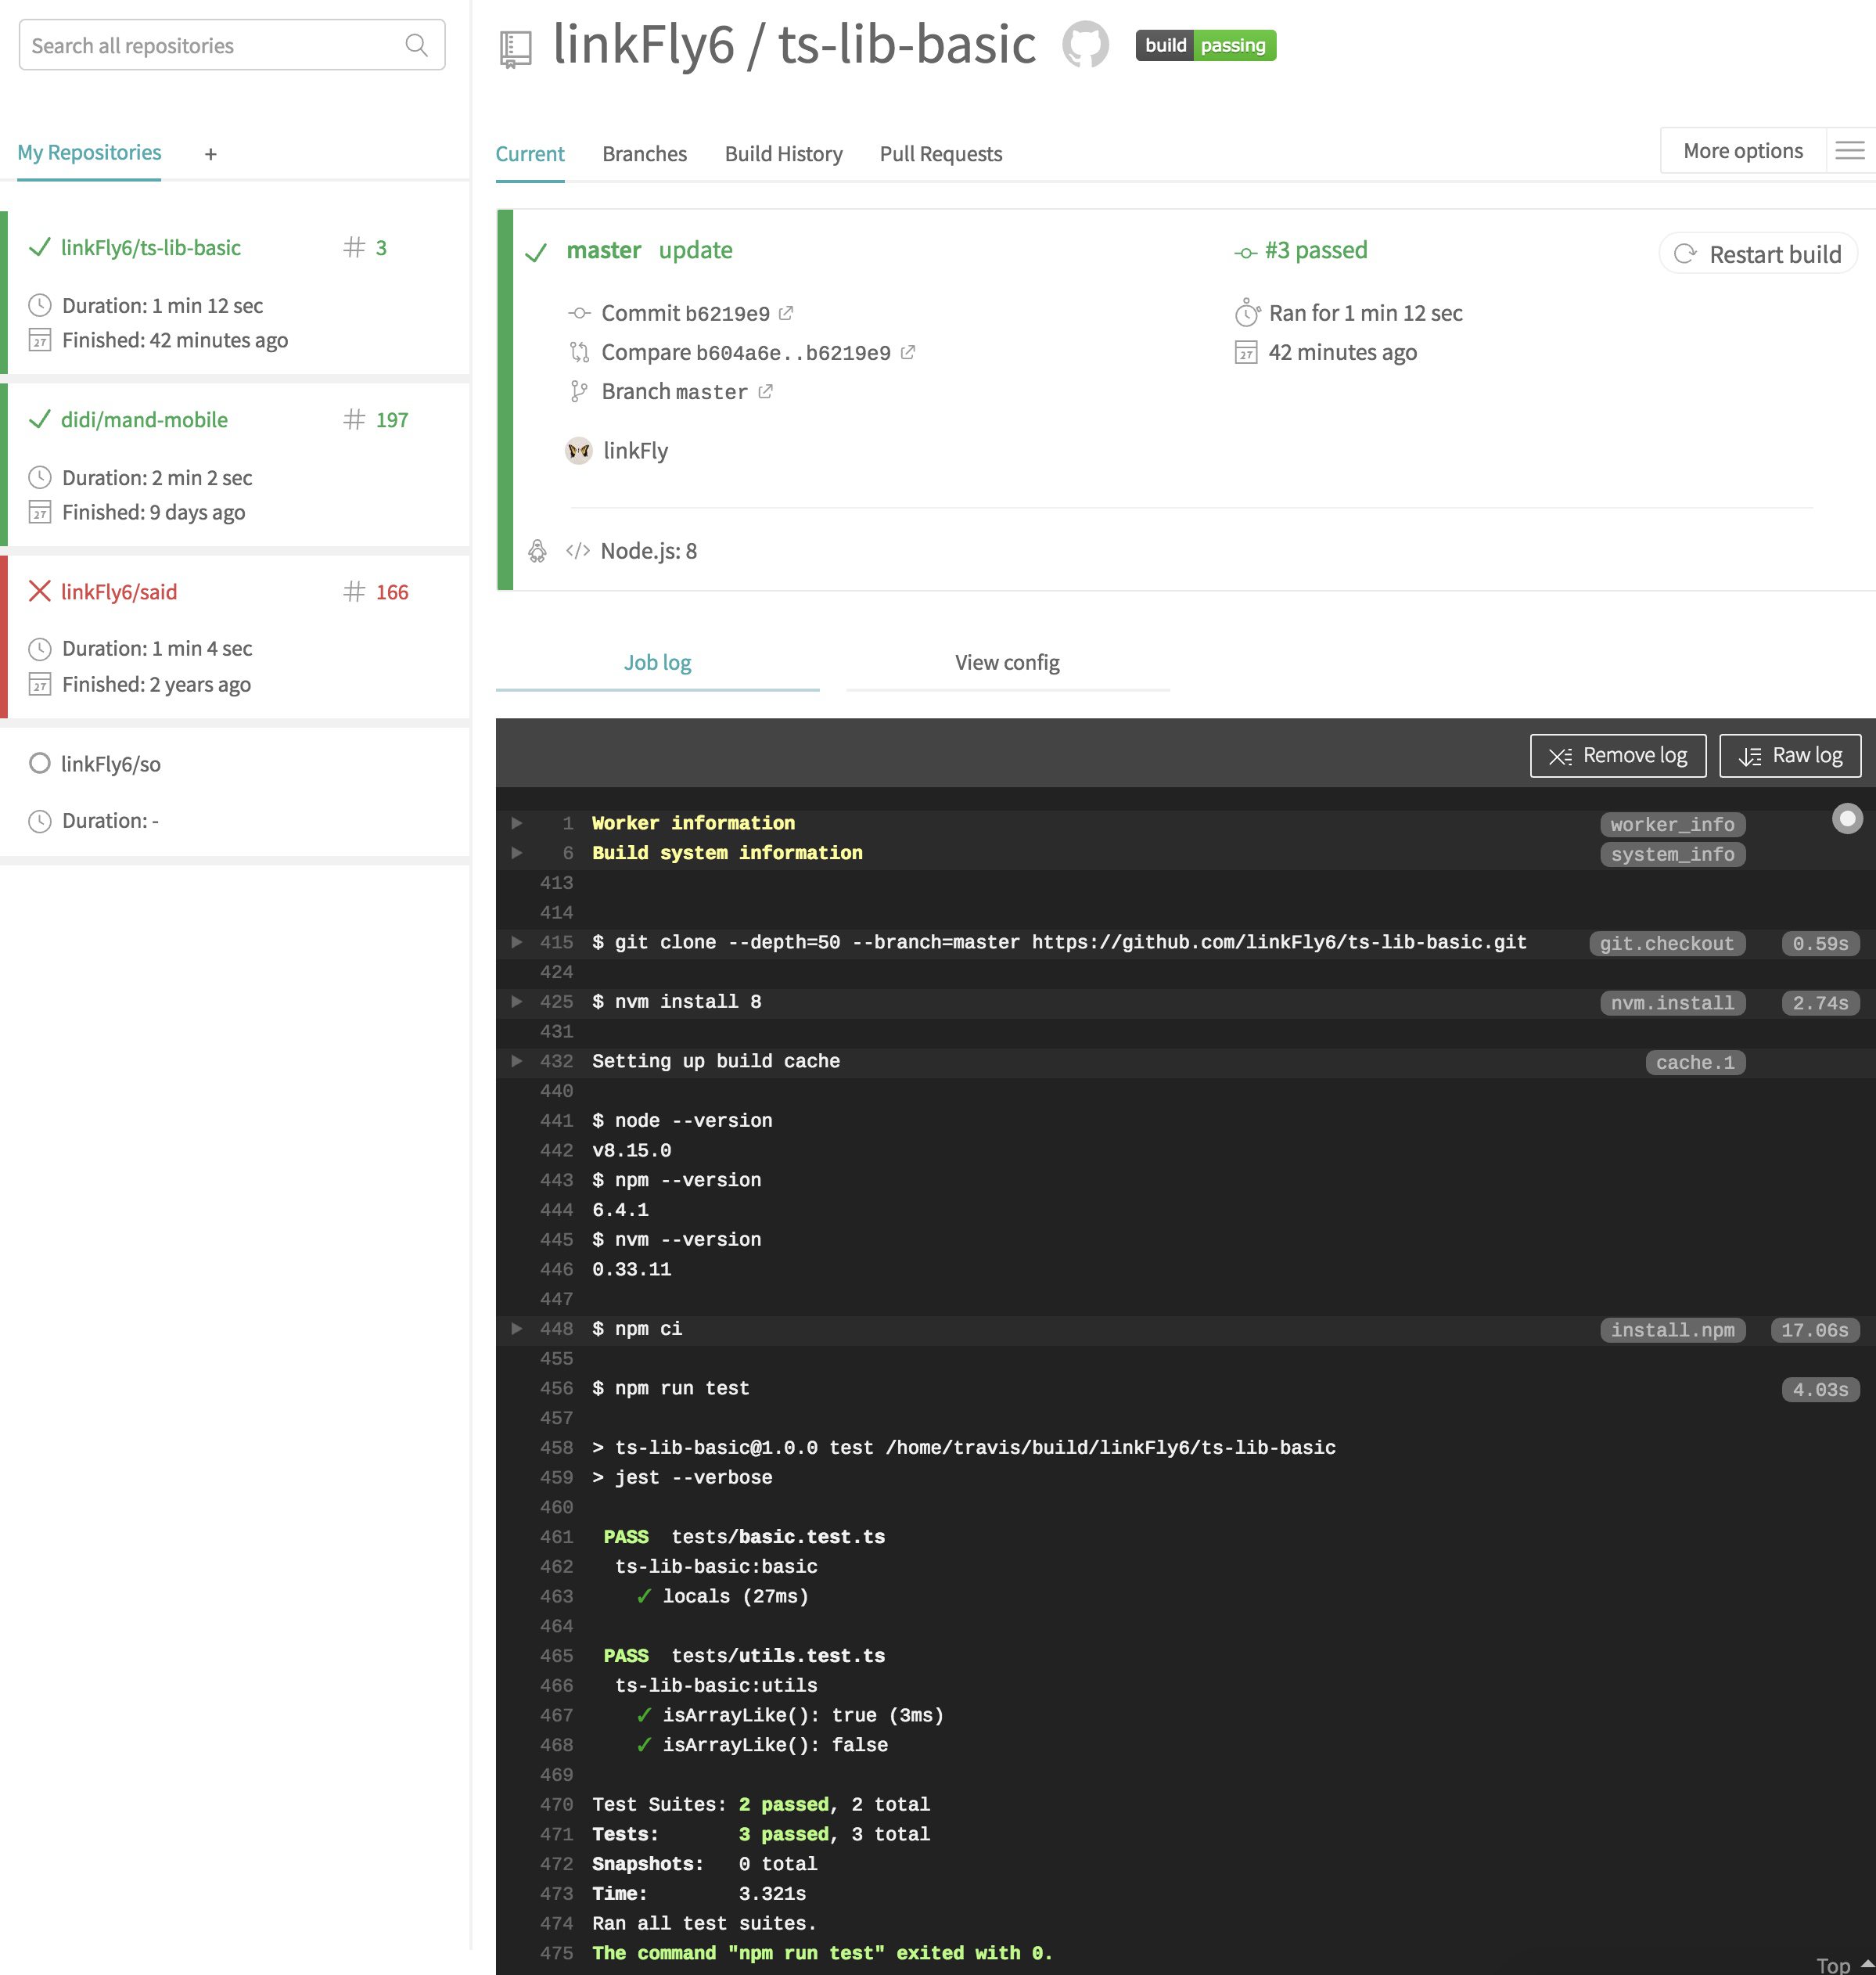
稍等大概几十秒,就可以在 travis-ci 里面看到自己的单元测试任务:
最后,在测试完毕的情况下,在 https://www.npmjs.com/ 进行注册。
在 npm 的源是官方的(npm config set registry https://registry.npmjs.org/)情况下,执行 npm login 登录 npm 以后,npm publish 发布包即可。
最后,为了迎合这篇文章,我编写了一个可以开箱即用的库模板:https://github.com/linkFly6/ts-lib-basic。
里面集成了这篇文章所阐述的所有内容。
前端开发 QQ 群:377786580
欢迎使用和了解金融出品的移动端组件库 Mand-mobile。


